Building a Companion Cube MK2
I said I would be building a second Companion Cube And here it is. On my search for how to build a Companion Cube I discovered multiple ways to build a Companion Cube. Most that I discovered turned out to be crap but I did come across some golden nuggets.
I found a program called "Pepakura" That makes is really easy to build 3D objects. If you read my first post you will have found a link for the Companion Cube Pepakura file for my first Companion Cube build.
In my last post I did mention that I contacted a youtuber "microwavabletofoo" who had offered to send his version of the Companion Cube Pepakura file.
He finally sent me the files and I started my new Companion Cube build.
"microwavabletofoo" In fact sent me two files to work from that you can down load here. One of the files was none textured Download Here and a textured version that you can Download Here.

This Companion Cube is made as one solid piece unlike the other Companion Cube that was made out of multiple sections.
You can see here the different sections this Companion Cube is made from.

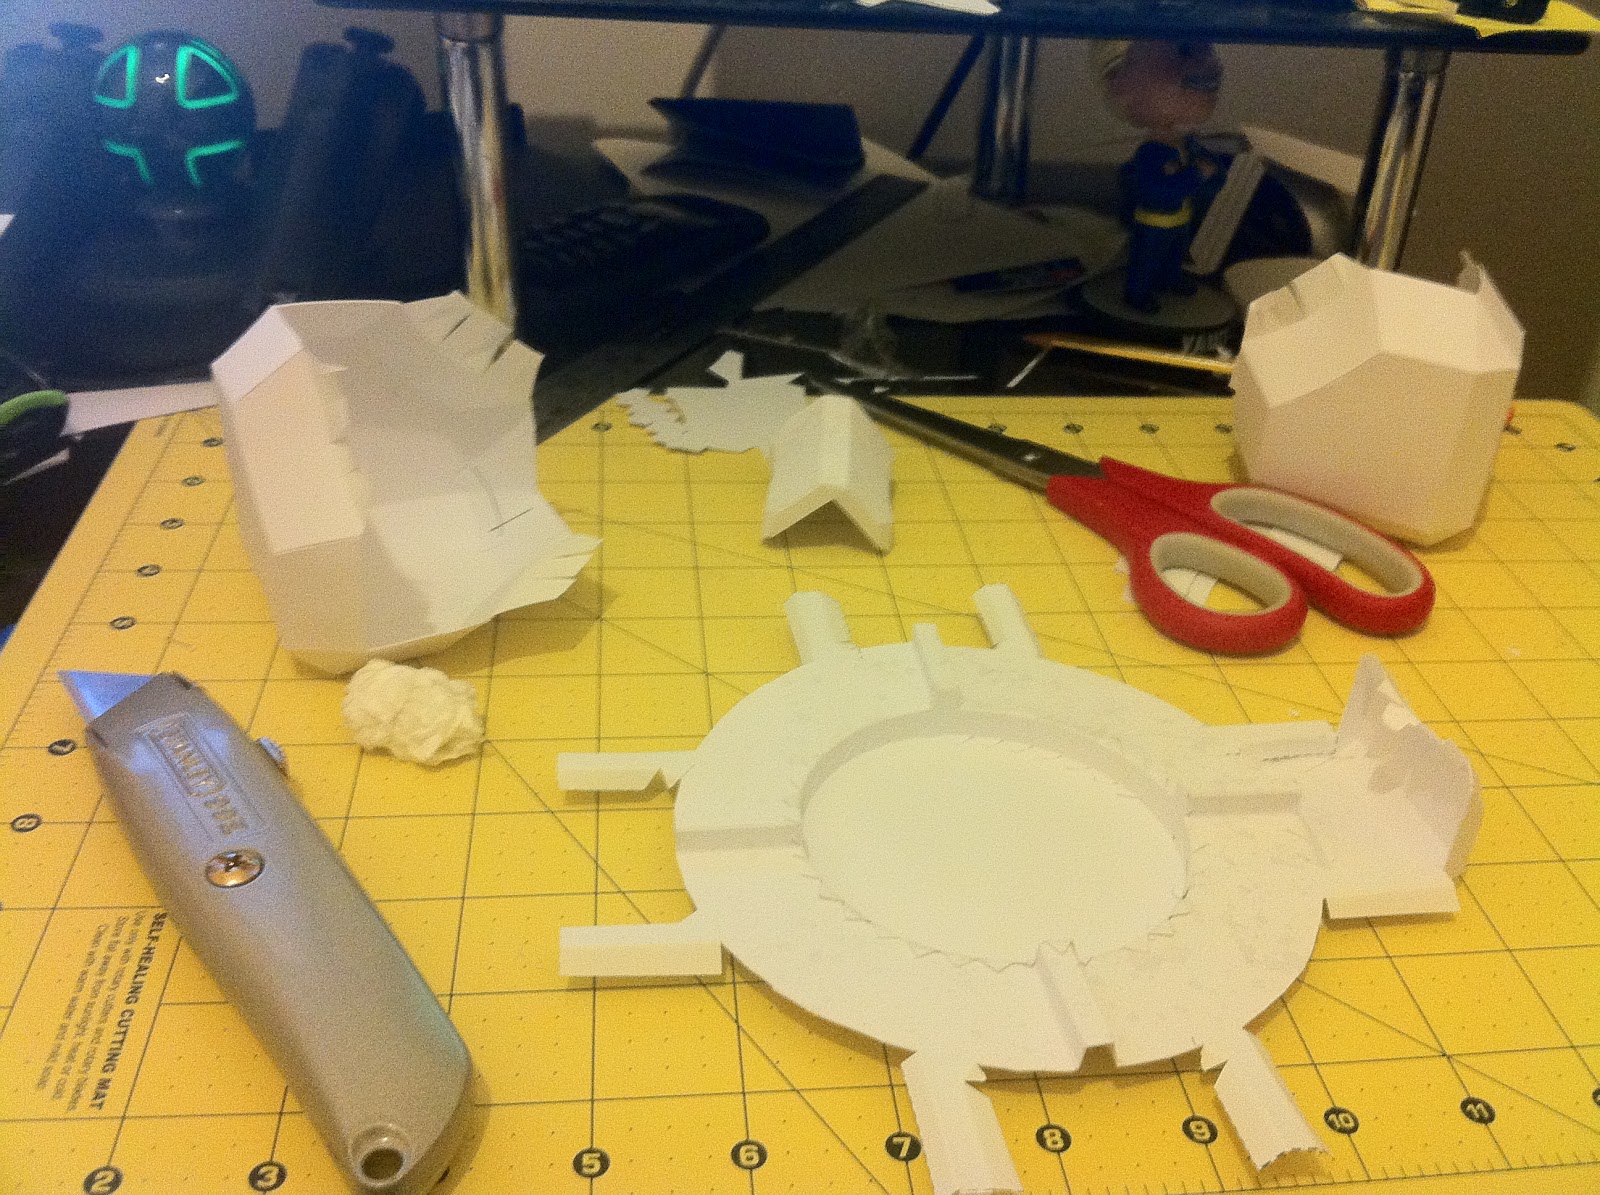
As you can see the Companion Cube is designed to be one whole piece.
I'm building two Companion Cubes because I want to build a Companion Cube chair but first I need to workout what the best build is.
I'm building two Companion Cubes because I want to build a Companion Cube chair but first I need to workout what the best build is.
Building the Companion Cube
First I made one face of the Companion Cube. This section was quite easy to do.

Attaching the other sides got quite fiddly.

But I didn't take to long to start looking like a Companion Cube.

I know that I could have to have access to the inside of the Companion Cube so I could Harden the thing So I left one of the round faces off one of the sides of the Companion Cube.

Hardening the Companion Cube
During my search on how to build a Companion Cube I also realised quite quickly that I would need to make the companion cube hard but not only hard but strong enough to stand on.
I found that people who make Cosplay armour also harden their armour with Fiberglass. So I decided to use the same method with my Companion Cube Build.
I had already tested the resin with my earlier build and worked out how best to use the smelly stuff.
So mixing 20ml of resin to about 6 centimetres of hardener I started painting the inside of the Companion Cube.
Now this fiberGlass resin cures fast like really fast and before I could use the whole 20ml's of mix the resin hardened...
So to combat this I only used 10ml batches. Once the inside was done I felt the Companion Cube to cure.


While the resin was setting I started to cut up the fiberglass mat ready for glueing into the Companion Cube.
This is what the inside of the Companion Cube Looked like after I glued all the fiberglass in place.


Horrible stuff that fiberglass mat... Glueing it into place was a nightmare but I did it in the end.
Then I resined up the out side of the Companion Cube.... and placed it next to the radiator to cure

I left the Companion Cube to Cure over night to make sure it was ready for the next stage.
Don't use fiberglass matt as its crap for this project I suggest that you use fiberglass tissues, I know I will with my next build.
After I fiberglassed the Companion Cube I painted it white.

Then I resined up the out side of the Companion Cube.... and placed it next to the radiator to cure

I left the Companion Cube to Cure over night to make sure it was ready for the next stage.
Next Stage
I just needed to resin up the inside of the Companion Cube again, all that fiberglass mat needed to be soaked in resin...
Don't use fiberglass matt as its crap for this project I suggest that you use fiberglass tissues, I know I will with my next build.
After I fiberglassed the Companion Cube I painted it white.
Painting the Companion Cube
So I gave the Companion Cube a quick blast of gray paint.


And Boom its done...


I'm very happy with this Companion Cube But I do feel if I was to make it again I would do it much better.
When I started resined the Companion Cube some of the resin blobbed up so I did not get the best finish...
In fact I have started to make A life size Companion Cube.... I will post a third blog once I have completed my next Companion Cube.
Kertins.....
what are the dimensions on this cube?
ReplyDeleteIts 20cm20cm20cm
Deletedamn, I wanted to make a portal cube xbox...
Deleteoh! and thank you!
DeleteYou could just scale it up...
DeleteSuperb job, can I just ask 2 questions, what thickness paper/card did you use and any recomendations on the glue for the model build ?
ReplyDeleteNot 100% sure on the card now sorry but try experimenting with different thicknesses. I used pva glue but a hot glue gun would work better and be faster.
Deletehi !
ReplyDeletedid you make it by using only paper ?
after i print it, it will be many pieces that i'll have to glue together?
how did you make it look so real, i mean that it doesnt even look like paper,so what did you do ?
thank you very much for your help and I really loved your work . : >
Its the fiber glass that makes it look real, I made this one with card then used a pva glus but if i was to do it again I would use a hot glue gun.
Deleteafter i print it, it will be many pieces that i'll have to glue together?
Deleteyes loads. it will take weeks to complete.
DeleteHey, um...I was wondering, how do you fit the last piece into the cube? I'm almost done making one, and just need to attach the last circular component to the face of the cube. How do you suggest doing so?
ReplyDeleteI made it remove able. btw send me some pix when its done XD
DeleteHi, this is microwavabletofoo. I'd just like to point out that the cube file was not "my version" as I did not create the file. The creator's name should be in the file description when opened in pepakura
ReplyDeleteHi guys, the files was deleted... Does anyone have the files?
ReplyDelete